Galleria in Tumblr
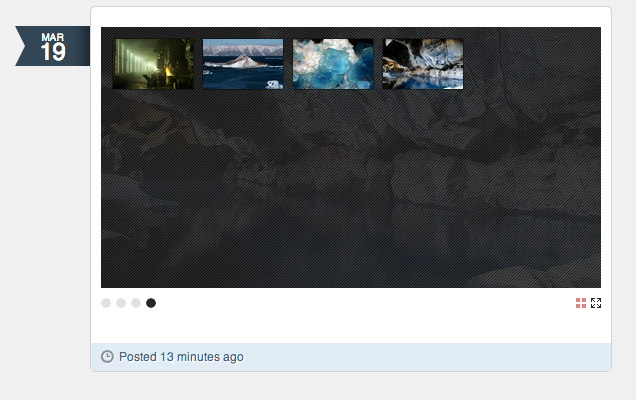
The image above shows the free Tumblr theme “Simpler Things” by Dan Hauk running an instance of Galleria with the “Miniml” theme in thumbnail mode.
This is a quick guide to help you turn a Tumblr photoset into a Galleria. It works with most Tumblr themes, though you should use it with caution if you change themes often.
1. Create the photoset
Log in to your Tumblr account and click on the photo icon. Upload the photos you want to display, and publish the post. This is necessary to get the right photoset id.
2. Edit the photoset
As soon as your photoset is saved, you should be able to click the pencil icon to edit it.
Scroll to the bottom of the edit window, where you will find the caption field. In the toolbar, you will find an html icon. Click it. It will turn blue, indicating that you are editing in html mode.
Copy the code below and paste it into the editor:
<script type="text/javascript">
    window.jQuery || document.write('\x3Cscript src="//ajax.googleapis.com/ajax/libs/jquery/1.9.1/jquery.min.js">\x3C/script>');
</script>
<script type="text/javascript">
    window.Galleria || document.write('\x3Cscript src="//cdnjs.cloudflare.com/ajax/libs/galleria/1.3.6/galleria.min.js">\x3C/script>\x3Cscript src="//cdnjs.cloudflare.com/ajax/libs/galleria/1.3.6/themes/classic/galleria.classic.min.js">\x3C/script>');
</script>
<script type="text/javascript">
(function () {
    // Change photoset_id below to match your photoset id.
    // It's the row of numbers at the end of the adress when you edit your post.
    // E.g. http://www.tumblr.com/edit/123456789
    // -------------------------------------------
        var photoset_id = '';
    // -------------------------------------------

    Galleria.configure({
        debug: false,
        lightbox: true
    })

    // No need to edit beyond this line
    var pc = $('[id*="' + photoset_id + '"]'),
        w = pc.width(),
        h = w*0.5625,
        ifr = pc.find('iframe');

    if ( ifr.length ) {
        var elem = ifr[0],
            onload = function() {
                var pc = ifr.parent(),
                    w = ifr.width(),
                    h = w*0.5625;
                if (pc.length)
                    Galleria.run(pc, { height: h, width: w, dataSource: ifr.contents()[0] });
            };
        elem.attachEvent && elem.attachEvent("onload", onload);
        elem.onload = onload;
    } else {
        if (pc.find('[id*="photoset"]').length) {
            pc = pc.find('[id*="photoset"]');
        } else if (pc.find('[class*="photoset"]').length) {
            pc = pc.find('[class*="photoset"]');
        } else {
            // This is a good place to put theme specific selectors
            // pc = $('#path.to[my="id"]');
            // w = pc.width();
            // h = w*0.5625;
        }
        if (pc.length)
            Galleria.run(pc, {height: h, width: w});
    }
}());
</script>
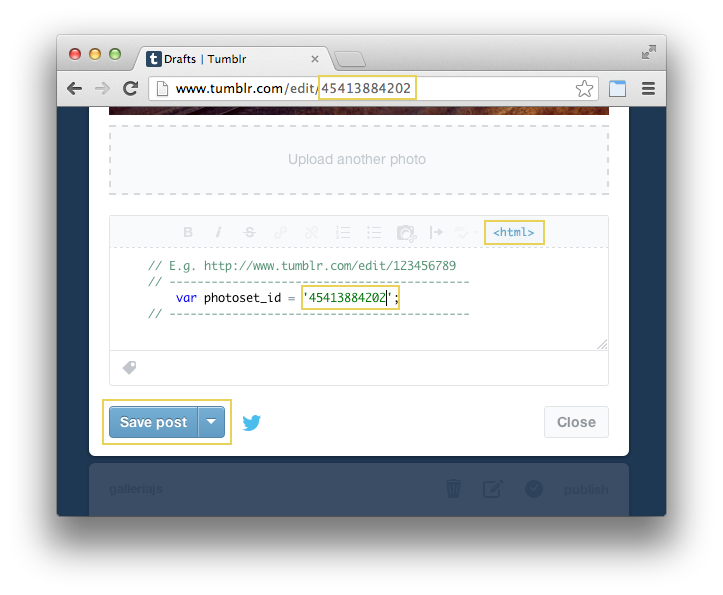
Find the line at the top of the script that reads var photoset_id = '';. This is where you put the individual id for this photoset.
You can find the photoset id at the end of the address in your browser’s location bar as you are editing. Copy all the numbers after www.tumblr.com/edit/.
Then, place you caret between the two single quotation marks on the line above, and paste. Save your post again.
3. Try it out
That’s it. You’re done. Now, we should point out that this script will work on nearly every Tumblr theme, but it’s not bullet proof. If it works with your theme and you don’t plan on switching themes any time soon, you’re probably fine. If you do switch themes, you should probably check one of your Galleriafied photosets to make sure it works as expected. Read more about theme compability below.
Troubleshooting
Tumblr gives theme developers a huge amount of freedom when creating themes. That’s nice, but it also makes it harder for Galleria to find the images you want it to display. The script above tries a few different methods to find the images. However, if the way a theme is built differs too much from a few assumptions made by the script, it will not be possible to locate the images in the photoset. Below you’ll find some of the possible problems.
Disclaimer:* Any modifications you do to your Tumblr theme are your responsibility. We do not support nor condone any such modifications.*
No photoset id: While testing the script, the most common reason it didn’t work was that the theme designer had chosen not to include the photoset id in the theme code. Galleria needs a way to identify a specific photoset, and will not work without it. Pro tip: Try editing the html of your Tumblr theme, and add this attribute to the photoset container: id="{PostID}".
Faulty selectors: On some themes, the photoset id might be there, but the markup is too different from what the scripts expects. In that case, you can try to find the right selectors yourself. How to do that is out of scope for this article, but you might get some insights by reading this text on jQuery selectors. If you’re able to find a selector that works for you, find the line in the script that reads // This is a good place to put theme specific selectors. Below are three lines of commented out javascript. Uncomment all three of them, and change the jQuery in the first line to suit your needs.
No scripts in the source code: If this is the case, your theme probably doesn’t print out the photoset caption. Pro tip: This can be fixed, but you need to edit your theme’s html. Go to the Tumblr html editor, find the block named Photoset ({block:Photoset}), and add this code somewhere suitable:
{block:Caption}
    {Caption}
{/block:Caption}
“Novelty themes”: Themes like Organ by simurai and Paper Stacks by alldayeverydaynyc will most likely not work with this technique. Some break gracefully, some don’t.